Click the Map | Coordinate Conversion command or click the  button.
In the Coordinate Conversion dialog, click the Destination System button.
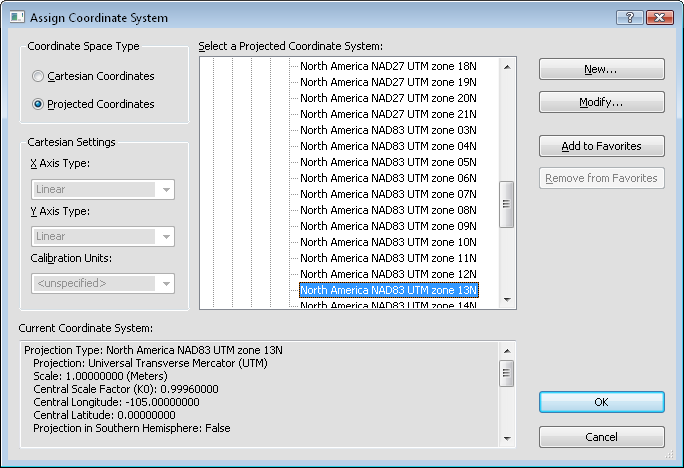
On the left side of the Assign Coordinate System dialog, select Projected Coordinates.
Click the  next to Predefined.
Click the next to Projected Systems.
Click the next to UTM.
Click the next to North America.
Click the North America NAD83 UTM zone 13N system.
Click OK to close the Assign Coordinate System dialog.
Click in the empty box next to the Input Data Units option. Select Meters from the list.
Click OK and the projection is defined for the project.