The Assign Coordinate System dialog is accessed from several locations. It links a file or the project to a specific coordinate system. Once a coordinate system is defined for a file, a Golden Software Georeference .GSR2 file is created. This file contains all the relevant coordinate system information that Didger needs to load the file in the proper coordinate system in the future.
When a .GSR2 file is created for a data file, it is read when creating grids or maps from the data file. The resulting grid or map layer has the same coordinate system as the original data file.
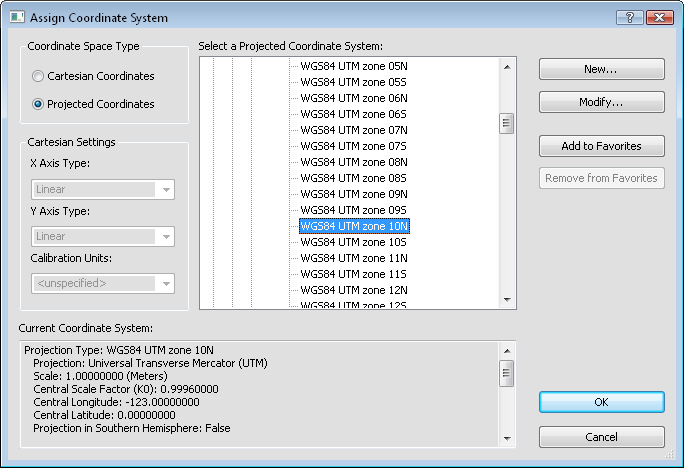
Assign a projection to your file or project in the Assign Coordinate System dialog.
Choose either Cartesian Coordinates or Projected Coordinates as the project Coordinate Space Type. Typically, Cartesian Coordinates are used for well logs, graphs, or documents with an arbitrary coordinate system (i.e. not real world XY coordinates). Projected Coordinates are typically used with maps that have known coordinates (i.e. latitude/longitude), projections, and datums.
X Axis Type and Y Axis Type are used with Cartesian Coordinates only. The Axis Type is either Linear or Logarithmic. The data must be greater than zero when using a Logarithmic axis. Values equal to and less than zero are ignored in the plot when the logarithmic type is selected. Well logs use both logarithmic and linear scales. The linear option is more common with real world maps.
Calibration Units are defined when specifying the coordinate system for an image file that needs control points defined.
Click the  button to expand the options in the Coordinate System dialog. Click the
  button to collapse the options.
Expand the Predefined section by clicking the + button. The Predefined section includes all coordinate systems that have been predefined for Didger.
Expand Geographic (lat/lon) to select a Latitude/Longitude coordinate system and datum that fits your needs. Detailed information about each projection is listed at the bottom of the dialog when the system is selected. If your data are currently in a form of lat/lon, you would want to select one of the options in Geographic (lat/lon).
Expand Projected Systems to select a predefined Polar/Arctic/Antarctic, Regional/National, State Plane, UTM, or World coordinate system. Detailed information about each projection is listed to the right when the datum is selected.
Expand the Templates section to select a predefined template. Click the desired template and press the Modify button to change the properties. Once modified, the new coordinate system is added to the Custom section.
Select a coordinate system and click the Add to Favorites button to add a coordinate system to your Favorites list. Alternatively, right-click on a selected coordinate system and choose Add to Favorites from the menu. Select a coordinate system and click the Remove from Favorites button to remove a coordinate system from your Favorites list. By default, no favorite coordinate systems are specified. It is recommended that systems that you use frequently and Custom systems that you intend to use more than once be added to the Favorites section for ease of navigation.
Expand Custom to see the custom coordinate system you have defined for the current file. Custom systems can be defined by clicking the New button. By default, no custom coordinate systems are specified. Custom coordinate systems are only listed in the dialog when the file using the custom coordinate system is open.
If a Custom coordinate system is defined and intended to be used more than once, it is highly recommended that the system be added to the Favorites section by clicking the Add to Favorites button.
Select any coordinate system from the Select a coordinate system list. Click the Modify button to open the Define Coordinate System dialog. Alternatively, right-click on the coordinate system and choose Modify from the menu. Modify any properties and click OK. The modified coordinate system is added to the Custom list.
If the Modify button is unavailable, make sure that a specific coordinate system is selected. If a category of systems, such as Predefined or Geographic (lat/lon) is selected, the Modify button is unavailable.
Click the New button to open the Define Coordinate System dialog and define a custom projection and datum. Alternatively, right-click on an existing coordinate system and choose New to create a new projection based off the selected projection. The new custom projection and datum will be listed in the Custom section with the name you defined.
Click the Add to Favorites button to add a projection to your Favorites list. Alternatively, right-click on a coordinate system and choose Add to Favorites. This is very useful if you frequently use the same projection, such as World Geodetic System 1984. This is also useful for Custom systems that will be used on multiple project files. Adding the projection to the Favorites list makes selecting the projection easier in the future.
If the Add to Favorites button is unavailable, make sure that a specific coordinate system is selected. If a category of systems, such as Predefined or Geographic (lat/lon) is selected, the Add to Favorites button is unavailable.
Select a coordinate system in the Favorites list and click the Remove from Favorites button to delete the system. Alternatively, right-click on a coordinate system in the Favorites section and choose Remove. The coordinate system is removed from the Favorites section.
If the Remove from Favorites button is unavailable, make sure that a specific coordinate system is selected in the Favorites list. If a category of systems, such as Predefined or Geographic (lat/lon) is selected or if a coordinate system is selected in a category other than Favorites, the Remove from Favorites button is unavailable.
In the Assign Coordinate System dialog, click the button to the left of Predefined.
Click the button to the left of Projected Systems.
Click the button to the left of UTM.
Click the button to the left of WGS84.
Select WGS84 UTM zone 13N.
Click OK. The projection for this data is now set to WGS84 UTM zone 13N.
In the Assign Coordinate System dialog, click the New button to open the Define Coordinate System dialog.
Change the Name to Lambert Conformal Conic Custom.
From the Projection list, select Lambert Conformal Conic.
Make any necessary changes to the Parameter or Values in the Projection section.
Make any necessary changes to the Datum section.
Click OK and the Lambert Conformal Conic Custom projection is added to the Custom section.
Click the custom projection and click OK to apply the projection to the data.
In the Assign Coordinate System dialog, click the button to the left of Custom.
Select the coordinate system in the Custom section and click the Add to Favorites button.
Click the button to the left of Favorites to open the Favorites section. The custom projection is saved here.
Click OK to close the dialog.
See Also