 button in the Layer Manager to open the Layer Formatter dialog.
Layer Formatter Dialog
Click on the button in the Layer Manager to open the Layer Formatter dialog.
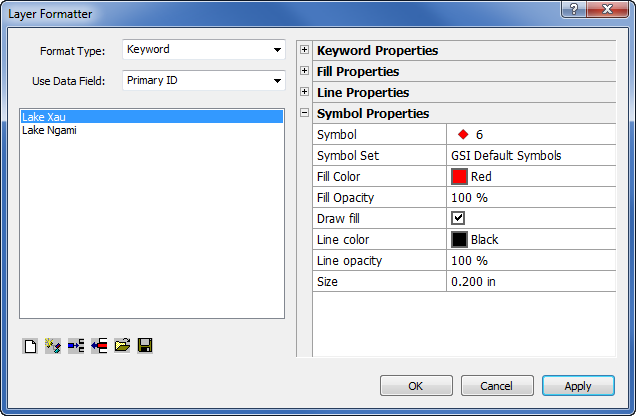
Set the properties for an object in the Layer Formatter dialog.
The Layer Formatter is a thematic mapping tool used to classify common data with symbols and colors. You can apply drawing properties to items that share a common attribute or keyword. For example, you can import a polygon layer representing geologic formations across the country. The formation field may have many records but only three possible formations: Granite, Schist, and Sandstone. The Layer Formatter uses the formation field as the keyword and adds all available values to a list in the data view. You can then select a value from the list and apply fill and line properties to all records that share a common name. In this example, fill properties could be blue for Granite, green for Schist, and red for Sandstone.
The Format Type determines how objects are selected. To change the Format Type, click on the existing option and select the desired option from the list. Select Keyword if you want to classify your data on items of a certain type, like surface and bottom hole well locations. Select Range if you want to categorize your data based on ranges within a data field. Range data are typically numeric data fields such as well depths, production cost, or population data.
The Use Data Field lists all ID field names in the selected layer. Select the field you want to classify your data on from the list of ID fields. After the Use Data Field is set, click the buttons at the bottom of the dialog to create the list.
The left side of the Layer Formatter lists the unique ID names. Select an item in the data list to activate the right side of the dialog. The right side of the dialog displays the keyword, fill, line and symbol properties available for the selected item in the list.
Click the  button to create a new list. The existing entries in the list are removed.
Click the  button to automatically create a new list based on all of the IDs in the Data Field for the selected layer. The list is automatically generated.
Click the  button to insert a new item in the list.
Click the  button to remove the selected item from the list.
Click the  button to open the Format Files dialog. Select the existing Didger Format Files (*.dfh) file from the dialog and click Open. The items from the list are displayed in the Layer Formatter dialog.
Click the  button to open the Format Files dialog. Type a name for the new Didger Format Files (*.dfh) file and click Save. The items from the list are saved to a new .DFH file.
To classify data based on a keyword:
In the Layer Manager, select the layer you want to classify.
Click the button.
Select Keyword as the Format Type.
Select the field name from the Use Data Field.
Click the button on the toolbar at the bottom of the dialog.
Select an item from the list generated by Auto Create Items.
On the right side of the dialog, select the fill, line or symbol properties to classify your data.
Click OK or Apply to apply the changes to the selected objects. Click Cancel to exit the dialog.
See Also