 button to open the Project Settings dialog. The Text Properties page controls the default text properties.
The Text Properties section in the Property Manager controls the text properties for the selected text object in the project. Text Properties, Font Properties, or Label Properties sections may exist in the Property Manager to control text properties for labels in drawn objects.
The text in a text block can be edited in the Text Editor.
Click the Tools | Project Settings command or click the button to open the Project Settings dialog. The Text Properties page controls the default text properties.
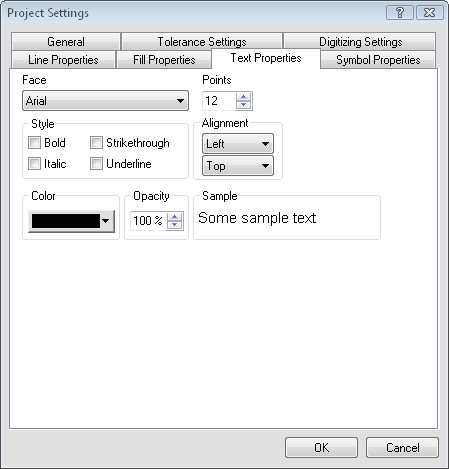
Set the default text properties on the
Text Properties page in the Project Settings dialog.
The Face is the font used for the text. To change the font, click on the current font name. Select the desired font from the list. Click the arrow button or select a font and use the ARROW keys on the keyboard to scroll through the Face list. The selected font is displayed in the Sample section. The font files that are installed on your computer are displayed in the Face list. Didger supports all true type fonts.
Set the text size in the Points field. Highlight the existing value and type a new value. Press ENTER on the keyboard to make the change. Or, click the  buttons to increase or decrease the size. A Points value between zero and 720 can be specified.
Check the boxes next to Bold, Italic, Strikethrough, or Underline to apply a style to the text. Note that some typefaces, such as Symbol, do not support bold or italicized text.
Bold will increase the thickness of the text (i.e. example).
Italic will create oblique text (i.e. example).
Strikethrough will add a horizontal line through the center of the text (i.e. example).
Underline will add a horizontal line under the text (i.e. example).
The Alignment controls the location of the text relative to the reference point. A reference point is the point clicked in the plot window when the crosshair cursor is placing the text on the screen. The text box is horizontally and vertically aligned relative to the reference point. The default position is that the reference point is at the upper left corner of the bounding box (left, top).
Left horizontally aligns the text box so that the reference point is to the left of the text box.
Center horizontally centers the text box on the reference point.
Right horizontally aligns the text box so that the reference point is to the right of the text box.
Top vertically aligns the text box so that the reference point is above the text box.
Baseline vertically aligns the text box so that the reference point is located at the base of the text. The baseline is the imaginary line along which characters are positioned as they are drawn. Descenders on characters (i.e. the loop on the lower case "g") are drawn below the baseline.
Bottom vertically aligns the text box so that the reference point is below the text box.
Center vertically centers the text box on the reference point.
You can click the Color button to open the color palette. Click on a color to use it for the text. You can create new colors by clicking the Custom button at the bottom of the color palette.
Change the Opacity of the text by entering a value from 0% (completely transparent) to 100% (completely opaque). To change the opacity, highlight the existing value and type a new value. Press ENTER on the keyboard to make the change. Alternatively, click the buttons to increase or decrease the opacity level.
A sample of the selected text options appears in the Sample section.
See Also