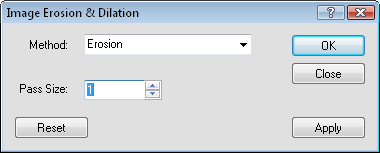
Image Erosion and Dilation
Click the Image | Processing Filters | Image Erosion and Dilation command to eliminate small image object features, such as noise spikes and ragged edges. Erosion and Dilation are normally used in vectorization pre-processing. The effect is to remove single-pixel object anomalies such as small spurs and single pixel noise spikes. As a result, objects are smoothed. This is particularly effective with contour images.
Set the Method, the Pass Size, and click
Apply to view the image with the filter.
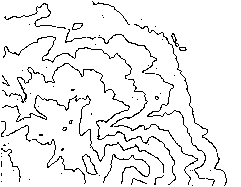
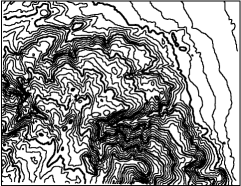
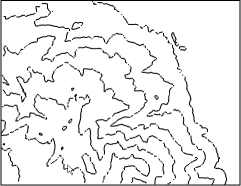
The Method is the type of process that is applied to the image. Available options are: Erosion, Dilation, Opening and Closing. To change the Method, click on the down arrow next to the existing option and select the desired option from the list. Erosion uniformly reduces the size of objects in relation to their background. Dilation uniformly expands the size of objects in relation to their background. Opening applies first Erosion and then Dilation. Closing applies first Dilation and then Erosion, filling in single pixel anomalies, such as holes and gaps. Examples of each are shown in the following graphics.
|
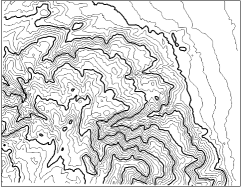
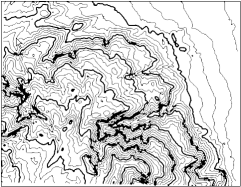
This is the image before using Image Erosion and Dilation processing filters. |
|
Pass Size
The Pass Size is the number of passes or consecutive operations used on an image. To change the value, highlight the existing number and type the desired value. Alternatively, click the  to increase or decrease the value. The Pass Size value must be any integer between 1 and 25. The lower the value, the less number of times the filter is applied. The higher the value, the more filtering is applied. This is useful if you want to build up the process incrementally to get the desired result.
To view the affects of the filter, select the desired Method and Pass Size and click Apply. The image in the Didger window changes to display the filtered image results.
To return the image to the original state, click Reset.
Click Apply to view the affects of the filter on the image in the Didger window. Click OK to apply the filter to the image and close the dialog. Click Close to close the dialog. Any filter that has been applied to the image are saved.
See Also