Check the Auto Advance Row Position box, located below the table containing the reference information.
In the table, click in row 1 on the CP1 ID.
Click on the Source Image tab at the top of the dialog.
Click the  button to activate the zoom in mode. Click a few times on the lower left corner of the map near CP1 to zoom in on the first calibration point. Alternatively, use the scroll ball on the mouse to zoom in on the CP1 point.
Click the  button to activate the calibration mode.
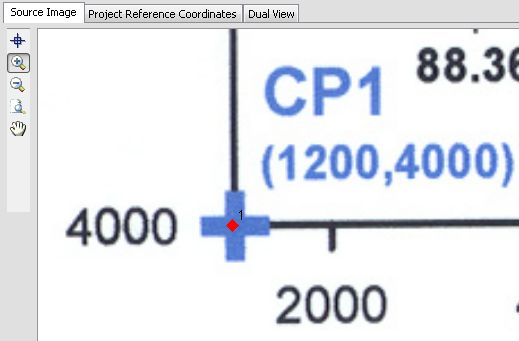
Center the cursor over the blue cross below CP1 and click the left mouse button. A small red calibration symbol and the number 1 appear in the location. Try to be as precise as possible when clicking on the calibration points as the resulting data are only as good as the calibration.
Click the  button to zoom out to the entire limits.
Follow the steps 4-7 to calibrate the remaining points: CP2, at the top center of the map; CP3, at the bottom right; and CP4, at the far right. If you make a mistake, you can click the calibration point name in the calibration table and then redigitize the point.