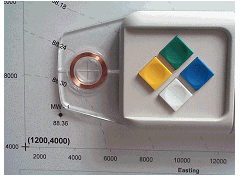
Digitizing with a tablet and puck, like the one shown below, is a fast and efficient method when documents such as larger paper maps or bore hole logs need to be converted into data. Digitizing tablets consist of a large flat surface with an underlying electronic detection system. To use the digitizer, the document is placed on the tablet. The document should not be moved after being placed on the tablet. The document is calibrated by setting the tablet location to some type of coordinate system. This is done by selecting from three to 256 calibration points. Once calibrated, points, polylines, and polygons can be transferred from the tablet to the computer screen, then printed or exported in a variety of formats.
You can digitize paper documents with a
digitizing tablet and a puck (shown above).
To begin digitizing:
Click the File | New command.
Place the document securely on the tablet. The document does not have to be perfectly oriented on the tablet because Didger corrects for any rotation in the document relative to the tablet.
Click the Draw | Tablet | Tablet Calibration command or click the  button.
The Tablet Calibration Wizard dialog opens, allowing the digitizing tablet to be calibrated before beginning work on the project.
In the first dialog, click the Coordinate System button.
In the Assign Coordinate System dialog, set the coordinate space type, axis units, calibration units, and projection if desired. This information must match the document's information.
Click OK.
Click Next.
In the Create Calibration Points dialog, set the calibration points to use. Select at least three calibration points on the document and determine the X and Y coordinates for each point.
Enter the calibration points in to the World X and World Y boxes. For each point, you must enter the X and Y coordinates that define the point’s position in the document.
The ID is optional.
Once you have entered the calibration points, click on point number one, and then move the tablet pointer over the point to be calibrated and click. A dot appears in the dialog indicating the point you clicked.
Continue clicking the calibration points until all are entered.
Click Next.
In the RMS Calibration Settings dialog, verify the calibration and the RMS value. If the value is not low enough, click Back and recalibrate the tablet. If the value is acceptable, click Next.
In the Calibration Settings dialog, set the tolerance values, the display units, and the tablet button settings. Click Next.
In the Specify Project Limits and Scale dialog, set the axis limits and scaling. Click Finish and the tablet is ready for digitizing.
Once the tablet is calibrated, click the commands on the Draw menu to draw objects. Use the tablet puck to click on the objects.
After objects are drawn, the map projection can be changed, if desired.
See Also
Introduction to Tablet Calibration