 button in the title bar of the Layer Manager, Coordinate Manager, Property Manager, or Data Manager to close the manager window. The Property Manager can also be opened by double-clicking on an object.
Changing the Window Layout
The windows, toolbars, managers, and menu bar display in a docked view by default; however, they can also be displayed as floating windows. The visibility, size, and position of each item may also be changed.
Click the View | Toolbars/Managers commands to toggle the display of the toolbars. Alternatively, use the View | Toolbars/Managers | Customize command to open the Customize dialog. The Toolbars page of the Customize dialog displays all of the toolbars. A check mark indicates the toolbar is currently visible. Reset toolbars with the Customize dialog.
Click the View | Toolbars/Managers commands to toggle the display of the Layer Manager, Coordinate Manager, Property Manager, and Data Manager. Alternatively, you can click the button in the title bar of the Layer Manager, Coordinate Manager, Property Manager, or Data Manager to close the manager window. The Property Manager can also be opened by double-clicking on an object.
Click the  button to hide a docked manager. The manager slides to the side or bottom of the main Didger window and a tab appears with the window name.

The Layer Manager appears
as a tab on the side of the window.
Position the mouse pointer over the tab to view the manager. Move your mouse away from the manager and the manager "hides" again. You can also click inside the manager to anchor it at its current position. Click in another manager to release the anchor and hide the manager. Click the  button to disable the auto-hide feature.
Drag the sides of floating plot window, manager, toolbar, or menu bar to change its size. If a manager is docked, its upper and lower bounds are indicated by a  or
or  cursor. Move the cursor to change the size.
To change the position of a docked manager, click the title bar and drag it to a new location. The entire manager appears in the location it will be displayed when the manager is floating. To dock the manager, use the docking mechanism. You can also double-click the manager's title bar to toggle between floating and docked modes. A tabbed manager view is also an option.
Left-click the title bar of a manager and drag it to a new location while holding the left mouse button. The docking mechanism displays with arrow indicators as you move the manager.
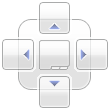
The docking indicator
can lock the location of
the manager windows.
When the cursor touches one of the docking indicators in the docking mechanism, a blue rectangle shows the window docking position. Release the left mouse button to allow the manager to be docked in the specified location.
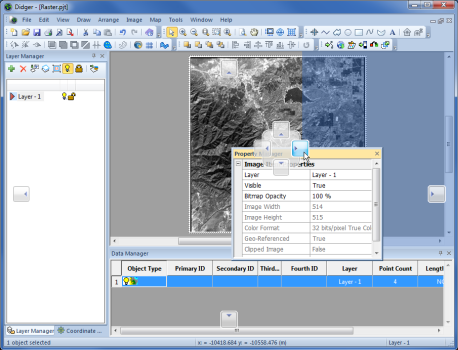
This image displays the Property Manager being docked to the right side of the Didger window.
To create tabbed managers:
Drag one manager on top of another window.
Hover over the center section of the docking mechanism. The blue area shows where the tabbed manager will display.
Release the mouse button.
To return to individual managers from the tabbed view:
Click on the manager's name on the tab.
Drag the tab to a new position.

Click on a manager's tab and drag it to a new position to separate the managers.
The toolbars and menu bar can also be moved or displayed in floating windows.
To dock the toolbar or menu bar in a new location, click the "grip" bar along the toolbar or menu bar edge, hold the left mouse button, and then drag the toolbar or menu bar to a new location. Drag the toolbar or menu bar away from the window edge to display the toolbar as a floating window. Double-click the manager title bar to switch between floating and docked.
If the managers have moved or become invisible, or if they are in undesired locations, click the View | Reset Windows command to move the managers and windows back to the original locations. Note that you must restart Didger for the changes to take effect.
See Also