Image Thinning
Click the Image | Processing Filters | Image Thinning command to reduce line images to one pixel width line segments. Image thinning is a good processing tool for black and white images that contain simple line or shape objects rather than complex shapes. It can be used for several applications, but is particularly useful for reducing foreground regions in a black and white image to a skeletal structure that largely preserves the extent and connectivity of the original region while removing most of the original foreground pixels. In this mode it is commonly used to tidy up the output of edge detectors by reducing all lines to single pixel thickness.
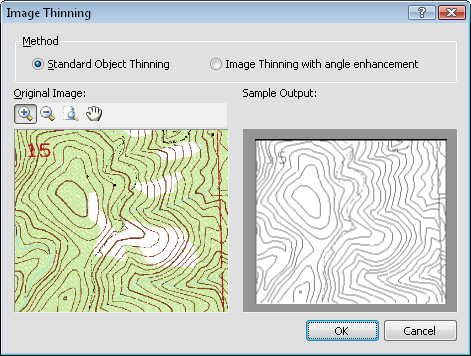
Use the Image Thinning dialog, to reduce lines in images to one pixel in width.
The Image Thinning dialog allows you to thin an image using either the Standard Object Thinning or the Image Thinning with angle enhancement method. The Standard Object Thinning method is the default and works on most images with rounded and curved shapes. The Image Thinning with angle enhancement method is a better option for images with corners and angular edges. Click on the desired method and the preview image updates.
The immediate effects of the image thinning changes are displayed in the dialog. The image on the left side is the Original Image, as it appears in the project. The image on the right is the Sample Output, which displays the changes as the image thinning is applied in the dialog.
Above the image are several buttons for zooming in or out on the image. Click the  button to enter zoom in mode. The cursor changes to
  to indicate zoom in mode. Click on the image to zoom in at the desired location. Click the
  button to the left of the image to enter zoom out mode. The cursor changes to
  to indicate zoom out mode. Click on the image to zoom out at the desired location.
Click the  button to zoom out to the entire extents of the image. The full image is displayed.
Click the  button to enter pan mode. Click and hold the mouse button down. The cursor changes to
  to indicate pan mode. Drag the mouse around to move the image. Alternatively, click and hold the mouse wheel down to pan around the image.
As the zoom changes in the Original Image view, the same zoom appears in the Sample Output view. This way you can compare the same extents with the applied settings in both views.
Click OK to apply the image thinning to the image. Click Cancel to close the dialog without applying the image thinning to the image.
See Also